Your KitchenAid stand mixer is a culinary workhorse, an essential tool for everything from delicate meringues to dense bread doughs. To keep it performing at its peak for years to come, just like any fine-tuned machine, it requires occasional maintenance. One of the most critical, yet often overlooked, tasks is regreasing its internal gears. Over time, the factory grease can break down, leading to various performance issues. This comprehensive DIY guide will walk you through the process of properly cleaning and regreasing your KitchenAid mixer, ensuring its smooth operation and extending its lifespan.
Understanding Your KitchenAid Mixer’s Gears
At the heart of every KitchenAid stand mixer is a robust gearbox, a marvel of engineering that translates motor power into the versatile mixing action you rely on. Within this gearbox, a series of gears – including the crucial worm gear and planetary gears – work in harmony, all coated in a specialized food-grade grease. This grease serves several vital functions: it reduces friction between moving parts, dampens operational noise, and protects the metal gears from premature wear and corrosion.
Why is regular gear greasing so crucial? Just like the oil in a car engine, the grease in your mixer degrades over time. Heat from prolonged use, especially with heavy loads like stiff doughs, causes the grease to break down, thin out, and even separate into oily and solid components. Degraded grease loses its lubricating properties, leading to increased friction, excessive heat buildup, and accelerated wear on the gears. Ignoring this maintenance can result in grinding noises, sluggish performance, and eventually, costly gear failure.
Common signs that your KitchenAid mixer needs new grease include:
- Unusual Noises: Grinding, squeaking, or knocking sounds during operation.
- Oil Leaks: You might notice dark, oily residue dripping from the planetary ring or around the mixer head. This indicates the grease has separated and is leaking out.
- Sluggish Performance: The mixer struggles with tasks it once handled easily, or the planetary action seems less robust.
- Visible Wear: In extreme cases, a disassembled mixer might reveal metal shavings in the old grease or visibly stripped gear teeth.
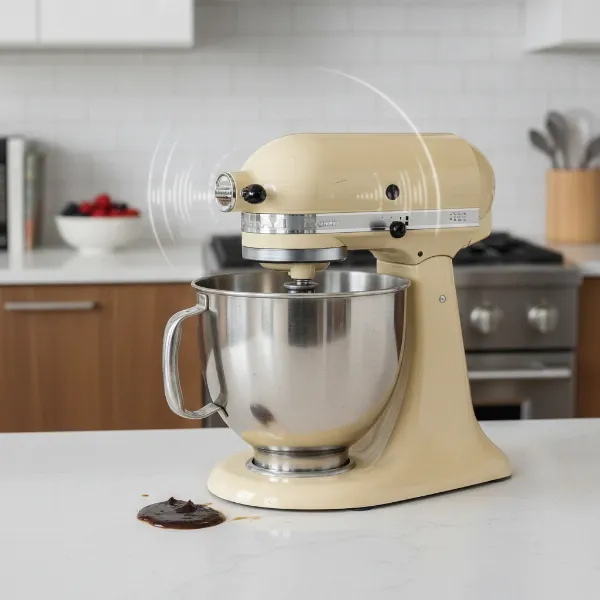 KitchenAid mixer showing signs of degraded grease with oil leak and unusual noises
How Often Should You Grease Your KitchenAid Mixer?
The frequency of greasing your KitchenAid mixer largely depends on its usage patterns. While these machines are built for durability, proactive maintenance is key to their longevity.
- New Mixers: Some experts recommend an initial greasing after approximately 50 hours of use to ensure optimal lubrication from the start.
- Regular Home Use: For most home bakers who use their mixer occasionally for standard tasks, regreasing is typically needed every 1 to 2 years, or after about 100 hours of cumulative use.
- Heavy Use: If your mixer is a frequent companion for heavy-duty tasks like kneading thick bread dough, making large batches, or extensive professional use, consider regreasing every 6 to 12 months, or after roughly 50 hours of intensive work.
- Infrequent Use: Even mixers that sit idle can benefit from attention. Grease can separate over long periods of inactivity. If your mixer hasn’t been used in a while, it’s a good idea to invert it for a few minutes (protected by a towel) and then run it on a high speed for a couple of minutes to help redistribute the grease before any major use.
Ultimately, the best indicator is your mixer itself. If you notice any of the aforementioned symptoms like unusual noises or oil leaks, it’s time for an inspection and regrease, regardless of how recently it was done.
Tools and Materials You’ll Need
Before you begin, gather all necessary tools and materials. Having everything at hand will make the process smoother and more efficient.
Essential Tools:
- Screwdrivers: Phillips head and various sizes of flathead screwdrivers are typically required for different screws.
- Punches: A set of small punches (e.g., 1/8-inch, 1/16-inch) and a rubber mallet or hammer will be needed to remove retaining pins.
- Rubber Mallet or Hammer: For gently tapping pins and loosening components.
- Plastic Scraper or Putty Knife: Ideal for carefully scraping out old grease without damaging components.
- Clean Cloths or Paper Towels: You’ll need plenty for wiping away old grease and cleaning.
- Small Brush or Toothpick (Optional): Helpful for reaching grease in tight crevices.
Materials:
- Food-Grade Gear Grease: This is the most crucial item. It must be NSF H-1 rated and typically an NLGI #2 viscosity. Popular and recommended options include Super Lube 41160, Mobil FM222, Phillips P66 Food Machinery Grease, or CRC SL35600. Avoid using non-food-grade greases or petroleum jelly, as they can be harmful if they come into contact with food and may not provide adequate lubrication for the gears.
- Isopropyl Alcohol (Rubbing Alcohol): Excellent for degreasing and cleaning residual gunk.
- Dish Soap (e.g., Dawn): For a final cleanup of components.
- Replacement Gear Case Gasket (Optional but Recommended): While not always strictly necessary, replacing the gasket is a good preventative measure, especially if your mixer has been leaking oil. The old gasket may be brittle or degraded.
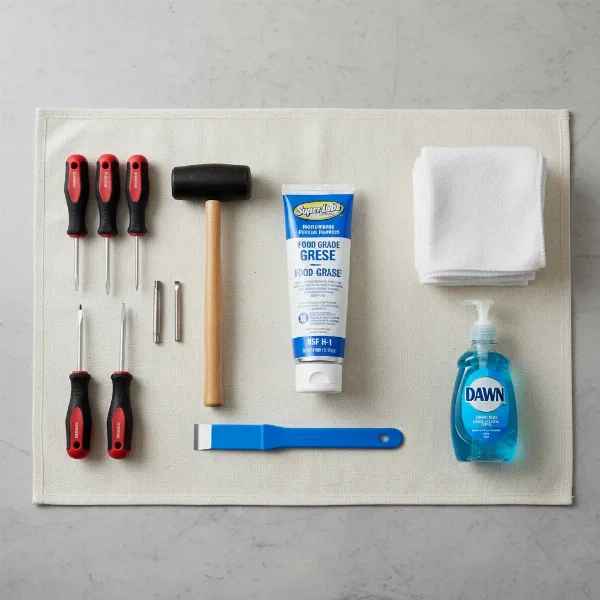 Essential tools and food-grade grease for KitchenAid mixer regreasing
Step-by-Step DIY Guide to Greasing Your KitchenAid Mixer Gears
This guide focuses on the general process. Specific screw locations and pin types may vary slightly by model (tilt-head vs. bowl-lift), but the overall principles remain the same. Always refer to your mixer’s service manual if available.
Step 1: Safety First & Preparation
|
Our Picks for the Best Stand mixer in 2026
As an Amazon Associate I earn from qualifying purchases.
|
||
| Num | Product | Action |
|---|---|---|
| 1 | Cuisinart SM-50G Precision Master 5.5-Quart 12-Speed Stand Mixer with Mixing Bowl, Chef's Whisk, Flat Mixing Paddle, Dough Hook, and Splash Guard with Pour Spout, Agave Green, Manual |

|
| 2 | Cuisinart SMD-50BC Precision Pro 5.5-Quart Digital Stand Mixer With 12-Speeds, 3 Preprogrammed Food Prep Settings, Mixing Bowl, Whisk, Flat Mixing Paddle, Dough Hook, And Splash Guard, Silver Lining |
|
| 3 | Cuisinart Stand Mixer, 12 Speeds, 5.5-Quart Mixing Bowl, Chef's Whisk, Flat Mixing Paddle, Dough Hook, and Splash Guard with Pour Spout, Silver Lining, SM-50BC, Silver Lining |
|
| 4 | Kitchen in the box Stand Mixer,3.2Qt Small Electric Food Mixer,6 Speeds Portable Lightweight Kitchen Mixer for Daily Use with Egg Whisk,Dough Hook,Flat Beater (Black) |
|
| 5 | Kitchen in the box Stand Mixer,3.2Qt Small Electric Food Mixer,6 Speeds Portable Lightweight Kitchen Mixer for Daily Use with Egg Whisk,Dough Hook,Flat Beater (Blue) |
|
| 6 | Kitchen in the box Stand Mixer,3.2Qt Mini Electric Food Mixer,6 Speeds Portable Lightweight Kitchen Mixer for Daily Use with Egg Whisk,Dough Hook,Flat Beater (Green) |
|
| 7 | Cuisinart SMD-50CRM Precision Pro 5.5-Quart Digital Stand Mixer with 12-Speeds, 3 Preprogrammed Food Prep Settings, Mixing Bowl, Chef's Whisk, Flat Mixing Paddle, Dough Hook, and Splash Guard, Cream |
|
| 8 | Cuisinart SMD-50GPH Precision Pro 5.5-Quart Digital Stand Mixer with 12-Speeds, 3 Preprogrammed Food Prep Settings, Mixing Bowl, Whisk, Flat Mixing Paddle, Dough Hook, and Splash Guard, Graphite |
|
| 9 | 3-IN-1 Electric Stand Mixer, 6.5QT Bowl 660W 10-Speed Kitchen Mixer, Household Food Mixers include Dough Hook, Beater and Whisk, Bread Cake Mixer for Baking and Most Home Cooks, Red |
|
| 10 | Cuisinart SPI-50 Spiralizer, White |
|
- Unplug the Mixer: This is paramount. Ensure the mixer is completely disconnected from any power source before you begin any work.
- Clear Your Workspace: Find a clean, well-lit area. Lay down towels or newspaper to protect your work surface from grease.
- Gather Tools: Have all your screwdrivers, punches, mallet, grease, and cleaning supplies within easy reach. Keep a small container handy to store screws and small parts as you remove them to prevent loss.
- Raise Mixer Head: If you have a tilt-head model, lock the head in the raised position. For bowl-lift models, ensure the bowl is removed.
Step 2: Disassembly – Opening Up Your Mixer
This phase involves carefully removing external covers and internal components to expose the gears. Work slowly and methodically, making note of where each screw and part comes from.
- Remove the Rear Cover: Locate the single Phillips head screw at the top of the rear cover. Remove it and gently pull off the cover.
- Remove the Trim Band/Metal Strip: This band typically wraps around the mixer head. You’ll usually find two Phillips head screws at the back, underneath where the rear cover was. Remove these, then carefully pry off the trim band.
- Remove the Planetary Ring: This chrome ring around the planetary shaft can usually be pried off with your hands or a flathead screwdriver. Be gentle to avoid bending it. Clean any grease from underneath it.
- Access the Planetary Cover: This cover is often secured by a small metal pin. Use a small punch (or a nail) and a rubber mallet to gently tap the pin out. Once the pin is removed, carefully pry off the planetary cover.
- Remove Housing Screws: You will likely find multiple screws holding the mixer’s head housing together. These vary by model but often include:
- Five flathead screws hidden behind the planetary cover.
- Four screws at the bottom of the mixer head (one may have a washer – note its location).
- Some models may have additional screws holding internal components.
- Dislodge the Power Cord: Near the rear of the mixer, the power cord is usually secured in a strain relief divot. Gently pull it out to allow the housing to separate.
- Separate the Mixer Housing: With all screws removed, carefully separate the top and bottom halves of the mixer head. You may need to gently pry them apart at the seam where the metal strip was.
- Remove Gears and Gasket: Once the housing is open, you’ll see the gearbox filled with old grease.
- Carefully remove the gasket that typically surrounds the base of the gears. Inspect it for tears or damage and consider replacing it.
- Depending on your model, you may need to remove several gears to thoroughly clean them. This often involves tapping out more pins. Take pictures or draw diagrams to remember the orientation of each gear and any washers or spacers. The worm gear (which often strips) and the planetary gears are usually the primary focus.
Step 3: Thorough Cleaning and Inspection
This is arguably the most critical step. Removing all old, degraded grease and inspecting for damage will ensure your new grease performs optimally.
- Scrape Out Old Grease: Use your plastic scraper, putty knife, or even an old spoon to scoop out as much of the old grease as possible from all internal cavities and off the gears. The old grease will likely be dark, sticky, and possibly separated.
- Clean Components:
- Use clean cloths or paper towels to wipe down all gears, shafts, and the inside of the mixer housing.
- For stubborn residue, apply a small amount of isopropyl alcohol to a cloth and wipe. Avoid saturating electronic components.
- A toothbrush or small brush can help clean gear teeth and hard-to-reach areas.
- For heavily soiled metal gears, you can wash them with warm water and dish soap (like Dawn), but ensure they are thoroughly dried immediately to prevent rust.
- Crucially, inspect all gear teeth for signs of wear, chips, or stripped sections. Look for metal shavings in the old grease, which indicate gear damage. If you find damaged gears, they should be replaced before reassembly.
- Dry Everything: Ensure all components are completely dry before proceeding.
Step 4: Applying New Food-Grade Grease
Now for the good part – replenishing your mixer with fresh, high-performance grease.
- Reinstall Gears (if removed): If you removed any gears for cleaning, carefully reassemble them in their correct order and orientation, securing any pins.
- Apply New Grease: Using a clean finger or a small spatula, apply a generous amount of the new food-grade grease to all the gear teeth.
- Ensure all contact surfaces of the gears are thoroughly coated.
- Don’t be shy, but avoid overpacking the housing entirely, as too much grease can create a knocking sound during operation or lead to excessive leakage. A good guideline is to fill the cavities around the gears so that they are well-coated and submerged, but not to completely cram the entire gearbox.
- Pay special attention to the planetary gear mechanism and the attachment hub gear if you frequently use attachments.
- Replace Gasket: If you are replacing the gear case gasket, install the new one now, ensuring it is properly seated around the gear housing.
Step 5: Reassembly and Testing
Carefully reverse the disassembly steps to put your mixer back together.
- Combine Housing Halves: Gently bring the top and bottom halves of the mixer head together, ensuring all wires are tucked away and no components are pinched.
- Secure Housing Screws: Reinstall all the screws you removed, starting with the four bottom screws and then the five planetary cover screws. Remember the screw with the washer if applicable. Tighten them snugly but avoid overtightening.
- Reattach Planetary Cover & Pin: Place the planetary cover back on and carefully reinsert its pin. You might need to wiggle the cover slightly to align the holes. A small tap with the rubber mallet may be needed to fully seat the pin.
- Reattach Planetary Ring, Trim Band, and Rear Cover: Reinstall these exterior components in reverse order of removal.
- Reinstall Power Cord Strain Relief: Push the power cord back into its divot at the rear of the mixer.
- Test the Mixer:
- Plug the mixer back into a power outlet.
- Run the mixer on its lowest speed for a few minutes. This allows the new grease to distribute evenly throughout the gearbox.
- Gradually increase the speed, listening for any unusual noises or vibrations. A slightly different sound is normal as the new grease settles, but grinding or knocking sounds indicate a potential issue with reassembly or damaged gears.
Common Mistakes to Avoid
- Using Non-Food-Grade Grease: This is a serious safety hazard. If non-food-grade grease leaks into your food, it can contaminate it. Always use NSF H-1 rated food-grade grease.
- Over-Greasing or Under-Greasing: Too little grease won’t protect the gears, while too much can cause unnecessary resistance, knocking noises, and excessive leakage. Aim for generous, even coating of the gears within the housing.
- Forgetting to Clean Thoroughly: Leaving old, degraded grease in the gearbox can contaminate the new grease, reducing its effectiveness and lifespan. Clean everything meticulously.
- Ignoring Worn Components: If you find damaged gears, a torn gasket, or other broken parts during cleaning, replace them. Greasing over damaged parts is a temporary fix that won’t solve the underlying problem.
- Voiding Your Warranty: If your KitchenAid mixer is still under its full manufacturer’s warranty, performing DIY repairs like regreasing might void it. Consider contacting KitchenAid service if this is the case.
FAQs About KitchenAid Mixer Gear Greasing
What type of grease is best for KitchenAid mixers?
The best grease for KitchenAid mixers is an NSF H-1 registered food-grade grease, typically with an NLGI #2 viscosity. Brands like Super Lube 41160 are highly recommended.
Can I use any food-grade grease?
While it should be food-grade (NSF H-1), ensure it’s also rated for gearboxes and has the correct NLGI #2 viscosity for optimal performance and protection. Avoid thinner lubricants or general-purpose food-grade greases not specifically designed for gears.
What if my mixer is still under warranty?
If your mixer is still under its full warranty, it is generally best to contact KitchenAid directly for service. DIY repairs might void your warranty.
How do I know if I’ve used too much grease?
A common sign of too much grease can be a knocking sound during operation, or excessive grease leaking out even after running the mixer for a while. If you suspect over-greasing, you may need to open it back up and remove some excess.
What if my mixer still makes noise after greasing?
If your mixer continues to make unusual noises after a thorough cleaning and regreasing, it could indicate damaged or worn-out gears that need replacement, or an issue with reassembly. Re-open the mixer and carefully inspect all gears and connections again.
Taking the time to grease your KitchenAid mixer’s gears is an empowering DIY task that can significantly impact its performance and lifespan. By understanding the “why” and following these steps, you’ll keep your trusted kitchen companion humming along for many more years of baking adventures. Regular maintenance is the secret ingredient to a stand mixer that truly stands the test of time. Now, go forth and bake!