Imagine the creamy, dreamy texture of homemade ice cream, crafted right in your kitchen, whenever a craving strikes. If you own a stand mixer, that dream is closer than you think. With the right attachment, your versatile kitchen workhorse can transform into a powerful ice cream maker, opening up a world of frozen dessert possibilities. Forget bulky single-use appliances; this guide will walk you through everything you need to know, from preparing your ingredients to churning your way to irresistible scoops.
The Stand Mixer Ice Cream Attachment: Your Gateway to Homemade Treats
A stand mixer ice cream attachment typically consists of a specialized freeze bowl and a dasher or paddle. The freeze bowl, containing a cooling gel, is pre-frozen solid, becoming intensely cold. When attached to your stand mixer, the dasher continuously churns and scrapes your ice cream base against the frigid walls of the bowl. This constant movement incorporates air while preventing large ice crystals from forming, resulting in the smooth, creamy consistency characteristic of premium ice cream. Many popular stand mixer brands, most notably KitchenAid, offer highly-rated attachments that seamlessly integrate with their mixers.
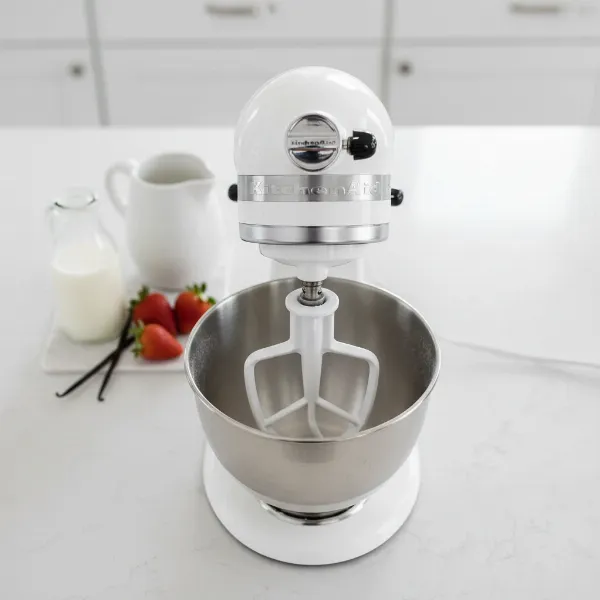 KitchenAid stand mixer with white ice cream maker attachment, bowl, and dasher assembled, ready for use.
Assembling Your Ingredients and Gear
Creating perfect homemade ice cream begins with the right tools and a well-prepared base.
Essential Equipment
|
Our Picks for the Best Stand mixer in 2026
As an Amazon Associate I earn from qualifying purchases.
|
||
| Num | Product | Action |
|---|---|---|
| 1 | Kitchen in the box Stand Mixer,3.2Qt Small Electric Food Mixer,6 Speeds Portable Lightweight Kitchen Mixer for Daily Use with Egg Whisk,Dough Hook,Flat Beater (Blue) |

|
| 2 | Cuisinart SMD-50GPH Precision Pro 5.5-Quart Digital Stand Mixer with 12-Speeds, 3 Preprogrammed Food Prep Settings, Mixing Bowl, Whisk, Flat Mixing Paddle, Dough Hook, and Splash Guard, Graphite |
|
| 3 | Cuisinart SMD-50BC Precision Pro 5.5-Quart Digital Stand Mixer With 12-Speeds, 3 Preprogrammed Food Prep Settings, Mixing Bowl, Whisk, Flat Mixing Paddle, Dough Hook, And Splash Guard, Silver Lining |
|
| 4 | Cuisinart SPI-50 Spiralizer, White |
|
| 5 | Cuisinart SM-50G Precision Master 5.5-Quart 12-Speed Stand Mixer with Mixing Bowl, Chef's Whisk, Flat Mixing Paddle, Dough Hook, and Splash Guard with Pour Spout, Agave Green, Manual |
|
| 6 | 3-IN-1 Electric Stand Mixer, 6.5QT Bowl 660W 10-Speed Kitchen Mixer, Household Food Mixers include Dough Hook, Beater and Whisk, Bread Cake Mixer for Baking and Most Home Cooks, Red |
|
| 7 | Cuisinart SMD-50CRM Precision Pro 5.5-Quart Digital Stand Mixer with 12-Speeds, 3 Preprogrammed Food Prep Settings, Mixing Bowl, Chef's Whisk, Flat Mixing Paddle, Dough Hook, and Splash Guard, Cream |
|
| 8 | Kitchen in the box Stand Mixer,3.2Qt Mini Electric Food Mixer,6 Speeds Portable Lightweight Kitchen Mixer for Daily Use with Egg Whisk,Dough Hook,Flat Beater (Green) |
|
| 9 | Kitchen in the box Stand Mixer,3.2Qt Small Electric Food Mixer,6 Speeds Portable Lightweight Kitchen Mixer for Daily Use with Egg Whisk,Dough Hook,Flat Beater (Black) |
|
| 10 | Cuisinart Stand Mixer, 12 Speeds, 5.5-Quart Mixing Bowl, Chef's Whisk, Flat Mixing Paddle, Dough Hook, and Splash Guard with Pour Spout, Silver Lining, SM-50BC, Silver Lining |
|
First and foremost, you’ll need your trusty stand mixer. Beyond that, the star of the show is the ice cream maker attachment itself, complete with its freeze bowl and churning paddle. Ample freezer space is also crucial, not only for the attachment bowl but also for properly chilling your ice cream base.
Crafting the Perfect Ice Cream Base
The heart of any great ice cream is its base. While recipes vary, the core components usually include heavy cream, whole milk, and sugar, often with a hint of vanilla for a classic flavor. Some recipes, known as custard-style, incorporate egg yolks to create a richer, denser texture, requiring a gentle cooking process before chilling. Philadelphia-style bases, on the other hand, skip the eggs, allowing the fresh dairy flavor to shine through and often simplifying the preparation.
Regardless of your chosen style, thoroughly chilling your ice cream base is paramount for success. After mixing, the base should be refrigerated for at least 8 to 24 hours. A cold base ensures efficient churning and prevents the attachment from warming up too quickly. A critical tip: avoid adding large amounts of alcohol to your base, as it can hinder the freezing process and prevent your ice cream from firming up properly.
Step-by-Step: Churning Your Homemade Ice Cream
With your base prepared and your equipment ready, it’s time for the magic to happen.
Pre-Freeze the Bowl – The Critical First Step
This is perhaps the most vital step. The freeze bowl of your attachment needs to be frozen solid—typically for 15 to 24 hours—before use. You’ll know it’s ready when you shake it and hear no sloshing sound, indicating the cooling liquid inside is completely frozen. Many experienced ice cream makers suggest storing the bowl in your freezer when not in use, ensuring it’s always ready for impromptu batches.
Assemble the Attachment on Your Stand Mixer
Once your freeze bowl is properly chilled, securely attach it to your stand mixer. The dasher or paddle fits inside the bowl, and then the mixer head is lowered and locked into place, with the dasher engaging with the mixer’s drive shaft. Always consult your specific attachment’s manual for precise assembly instructions.
Churning the Ice Cream Base
Before adding your chilled ice cream base, turn your stand mixer on to its lowest “stir” speed. This ensures the dasher begins rotating immediately, preventing the cold mixture from freezing onto the sides of the bowl before churning can properly begin. Slowly pour your well-chilled ice cream base into the moving bowl. Continue churning for approximately 20 to 30 minutes. During this time, the mixture will thicken and expand, transforming into a soft-serve consistency.
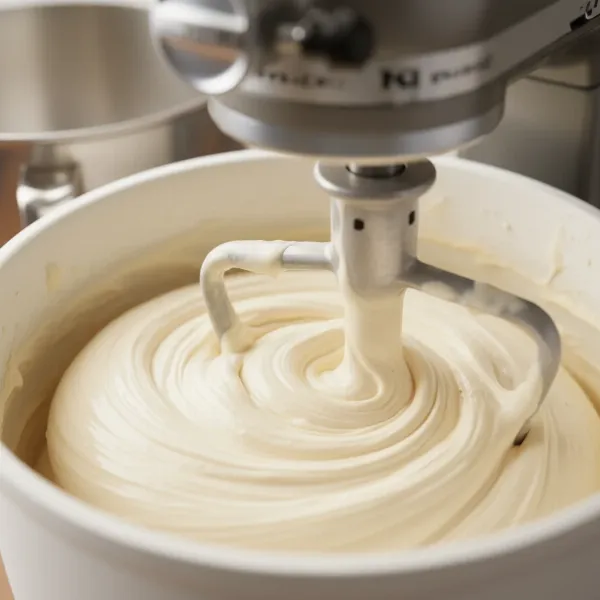 Close-up of homemade vanilla ice cream churning in a stand mixer attachment, reaching soft-serve consistency.
Incorporating Mix-Ins and Finishing
Towards the last few minutes of churning, typically in the final five minutes, is the ideal time to add any desired mix-ins, such as chocolate chips, chopped nuts, fruit pieces, or cookie crumbles. This allows them to be evenly distributed throughout the partially frozen ice cream.
Once churning is complete and your ice cream has reached a soft-serve consistency, transfer it immediately to an airtight container. For a firmer, scoopable texture, place the container in your freezer for an additional 2 to 4 hours, or preferably overnight. This “ripening” phase allows the ice cream to harden further and develop a more robust flavor.
Expert Tips for Stand Mixer Ice Cream Success
Achieving perfect homemade ice cream every time involves a few insider tricks:
- Temperature is King: Beyond pre-freezing the bowl, ensure your ice cream base is as cold as possible before churning. A stint in an ice bath or a brief period in the freezer (being careful not to freeze it solid) can help.
- Don’t Overfill: The freeze bowl is designed for a specific volume. Overfilling can prevent proper churning and aeration, leading to icier results.
- Keep it Moving: If you notice ice building up on the sides of the bowl during churning, the mixer speed might be too low, or your base isn’t cold enough.
- Experiment Boldly: The beauty of homemade ice cream is customization. Don’t shy away from experimenting with unique flavor combinations and various mix-ins.
Stand Mixer Ice Cream Attachment: Pros, Cons, and Alternatives
Deciding if a stand mixer ice cream attachment is right for you involves weighing its benefits against potential drawbacks.
Advantages
For those who already own a stand mixer, an attachment offers a significant space-saving advantage. It eliminates the need for another standalone appliance cluttering your countertops or cupboards. Furthermore, it’s often a more cost-effective entry point into homemade ice cream making compared to purchasing a dedicated machine. It’s an excellent choice for individuals who enjoy making ice cream occasionally and appreciate the versatility of their existing mixer.
Disadvantages and Considerations
One notable drawback is the required pre-freezing time for the bowl, which can be 15-24 hours. This means spontaneous ice cream making isn’t always possible. Some users have also reported durability issues with certain attachments, experiencing cracking or leakage of the cooling liquid after repeated use. For those who plan to make ice cream frequently or in large, successive batches, the limited capacity and the need to refreeze the bowl between batches might be inconvenient. Dedicated compressor-style ice cream makers, though more expensive, offer the ability to make multiple batches consecutively without pre-freezing.
When to Consider a Dedicated Ice Cream Maker
If you envision yourself becoming a fervent ice cream artisan, churning batches several times a week, or needing larger quantities for events, a dedicated compressor ice cream maker might be a worthwhile investment. These machines offer more power and often faster, more consistent results without the wait time for bowl refreezing.
Your Stand Mixer Ice Cream Buying Guide
If you’re ready to embrace the world of homemade ice cream via your stand mixer, here’s what to keep in mind:
First, verify compatibility with your specific stand mixer model. Most attachments are designed for particular mixer types (e.g., tilt-head or bowl-lift). Always read recent reviews for any attachment you’re considering, paying close attention to feedback on durability and overall performance. While KitchenAid attachments are widely popular, understanding user experiences can guide your decision.
Ultimate Buying Guide: Choosing Your Ice Cream Method
Ultimately, the best method for making ice cream depends on your needs. For casual bakers and dessert enthusiasts who already own a stand mixer, the ice cream attachment is a convenient, space-saving, and rewarding way to create delicious frozen treats. It offers a perfect balance of convenience and quality, allowing you to personalize flavors and enjoy fresh, homemade goodness.
“Making ice cream at home with an attachment lets you tailor every spoonful to your exact preference – something store-bought just can’t match.” – Admin, Standmixerpro.com, Stand Mixer Specialist
Whether it’s a simple vanilla or a complex custom creation, your stand mixer attachment empowers you to bring your frozen dessert dreams to life.
Frequently Asked Questions
How long does it take to freeze the stand mixer ice cream bowl?
The stand mixer ice cream bowl typically needs to be pre-frozen for 15 to 24 hours, or until the liquid inside is completely solid and you hear no sloshing. Storing it in the freezer permanently ensures it’s always ready.
Can I make ice cream without eggs in my stand mixer?
Yes, you can absolutely make egg-free ice cream, often referred to as Philadelphia-style. These recipes primarily use heavy cream, whole milk, and sugar, and rely on thorough chilling and churning to achieve a smooth texture.
Why isn’t my ice cream getting firm in the attachment?
The most common reasons are an insufficiently frozen bowl or an inadequately chilled ice cream base. Ensure the bowl is frozen solid for at least 15-24 hours and your base has been refrigerated for 8-24 hours before churning. High ambient kitchen temperature can also play a role.
What are some common mix-ins for homemade ice cream?
Popular mix-ins include chocolate chips, cookie dough pieces, chopped nuts (pecans, walnuts), fresh fruit (strawberries, blueberries), crushed cookies, candy bits, and swirls of caramel or fudge. Add them during the last few minutes of churning.
How do I clean my ice cream maker attachment?
After use, allow the freeze bowl to come to room temperature. Wash the bowl, dasher, and any other components with warm, soapy water. Rinse thoroughly and dry completely before reassembling or storing the bowl back in the freezer. Always avoid harsh abrasives.