As an Admin of Standmixerpro.com with over a decade immersed in the world of stand mixers, I’ve witnessed countless home bakers struggle with a surprisingly common issue: inconsistent mixing. You know the drill – patches of unmixed flour clinging to the bottom, cream refusing to whip, or dough that never quite comes together. Often, the culprit isn’t your recipe or technique, but simply an improperly adjusted beater-to-bowl clearance. This seemingly minor detail is, in fact, the cornerstone of efficient and effective mixing, transforming your stand mixer from a frustrating tool into a powerful kitchen ally.
Understanding Beater-to-Bowl Clearance
Beater-to-bowl clearance refers to the precise distance between your stand mixer’s attachment (beater, whisk, dough hook) and the bottom or sides of the mixing bowl. When this gap is just right, your mixer can thoroughly incorporate all ingredients, ensuring uniform textures and consistent results in every recipe you tackle.
This calibration is critical for several reasons. Firstly, proper clearance guarantees every ingredient, from the smallest pinch of salt to the thickest dollop of butter, is fully integrated into your mixture. Secondly, it prevents costly damage. A beater set too low can scrape against the bowl, chipping off its protective coating or even damaging the bowl itself. Conversely, a beater too high will leave ingredients untouched at the bottom, leading to under-mixed batters and underdeveloped doughs. Over time and with consistent use, even factory-set clearances can shift, making periodic adjustments a necessary part of stand mixer maintenance.
You’ll know your stand mixer needs an adjustment if you notice common issues like:
- Unincorporated ingredients: A layer of unmixed butter or flour at the bottom of the bowl, particularly with thick batters or doughs.
- Beater scraping the bowl: A distinct metallic sound or visible scratches on your bowl or chipped coating on your beater.
- Attachments not reaching: Whipped cream or egg whites taking an unusually long time to achieve volume, or small quantities of ingredients not getting picked up.
- Motor straining: The mixer motor sounds labored, especially when dealing with stiff doughs, indicating the attachment is too close to the bowl.
- Visible wobble: The mixer head might wobble slightly more than usual during operation, sometimes indicating that the head isn’t fully locked or the adjustment is off.
The Essential “Dime Test” for Accuracy
The most reliable and widely recommended method for checking your stand mixer’s beater-to-bowl clearance is “The Dime Test.” This simple yet effective technique provides a clear visual indicator of whether your mixer is performing optimally.
Here’s how to perform it:
- Safety First: Always ensure your stand mixer is turned off and unplugged from the power outlet before making any adjustments or conducting tests.
- Attach the Flat Beater: Secure the flat beater (paddle attachment) to your mixer. This is the standard attachment used for testing, as its broad surface best demonstrates the clearance.
- Place a Dime: Drop a standard dime into your empty mixing bowl.
- Engage the Mixer: For tilt-head models, lower and lock the head. For bowl-lift models, raise the bowl into its mixing position.
- Run on Low Speed: Turn your mixer to its lowest speed setting for a brief moment, just long enough for the beater to make a few passes.
- Observe the Dime:
- If the dime doesn’t move: Your beater is too high and isn’t reaching the bottom of the bowl.
- If the dime scrapes continuously or gets stuck: Your beater is too low and is making too much contact with the bowl.
- If the dime travels smoothly around the bottom of the bowl, moving about a quarter to half an inch with each pass of the beater: Your beater-to-bowl clearance is perfectly adjusted.
 A hand performing the dime test on a stand mixer to check beater-to-bowl clearance.
Step-by-Step Adjustment for Different Stand Mixer Types
Adjusting the clearance is straightforward, but the exact location of the adjustment screw varies depending on whether you have a tilt-head or bowl-lift stand mixer. Remember, small, incremental turns are key to achieving precision.
For Tilt-Head Stand Mixers
Tilt-head mixers are characterized by a head that tilts back for easy access to the bowl and attachments.
- Preparation: Turn off and unplug your mixer.
- Lift and Lock: Grasp the head of your stand mixer and tilt it back gently until it locks into the raised position.
- Locate the Screw: Look inside the hinge where the mixer head meets the body. You will find a large flat-head screw. This is your beater height adjustment screw.
- Adjust:
- To lower the beater (increase contact with the bowl), turn the screw slightly clockwise (to the right).
- To raise the beater (increase clearance from the bowl), turn the screw slightly counter-clockwise (to the left).
- Only make very slight turns – no more than a quarter turn at a time. The full range of adjustment is typically only about half a turn (180 degrees).
Our Picks for the Best Stand mixer in 2026As an Amazon Associate I earn from qualifying purchases.Num Product Action 1 Cuisinart SMD-50CRM Precision Pro 5.5-Quart Digital Stand Mixer with 12-Speeds, 3 Preprogrammed Food Prep Settings, Mixing Bowl, Chef's Whisk, Flat Mixing Paddle, Dough Hook, and Splash Guard, Cream 
2 Cuisinart SMD-50GPH Precision Pro 5.5-Quart Digital Stand Mixer with 12-Speeds, 3 Preprogrammed Food Prep Settings, Mixing Bowl, Whisk, Flat Mixing Paddle, Dough Hook, and Splash Guard, Graphite
3 Kitchen in the box Stand Mixer,3.2Qt Small Electric Food Mixer,6 Speeds Portable Lightweight Kitchen Mixer for Daily Use with Egg Whisk,Dough Hook,Flat Beater (Black)
4 Cuisinart SPI-50 Spiralizer, White
5 3-IN-1 Electric Stand Mixer, 6.5QT Bowl 660W 10-Speed Kitchen Mixer, Household Food Mixers include Dough Hook, Beater and Whisk, Bread Cake Mixer for Baking and Most Home Cooks, Red
6 Cuisinart Stand Mixer, 12 Speeds, 5.5-Quart Mixing Bowl, Chef's Whisk, Flat Mixing Paddle, Dough Hook, and Splash Guard with Pour Spout, Silver Lining, SM-50BC, Silver Lining
7 Cuisinart SM-50G Precision Master 5.5-Quart 12-Speed Stand Mixer with Mixing Bowl, Chef's Whisk, Flat Mixing Paddle, Dough Hook, and Splash Guard with Pour Spout, Agave Green, Manual
8 Kitchen in the box Stand Mixer,3.2Qt Small Electric Food Mixer,6 Speeds Portable Lightweight Kitchen Mixer for Daily Use with Egg Whisk,Dough Hook,Flat Beater (Blue)
9 Cuisinart SMD-50BC Precision Pro 5.5-Quart Digital Stand Mixer With 12-Speeds, 3 Preprogrammed Food Prep Settings, Mixing Bowl, Whisk, Flat Mixing Paddle, Dough Hook, And Splash Guard, Silver Lining
10 Kitchen in the box Stand Mixer,3.2Qt Mini Electric Food Mixer,6 Speeds Portable Lightweight Kitchen Mixer for Daily Use with Egg Whisk,Dough Hook,Flat Beater (Green)
- Test: Lower the mixer head, run the dime test again, and repeat the adjustment process if necessary until the dime moves correctly. If you over-adjust, the bowl lock lever might not engage properly, so proceed with caution.
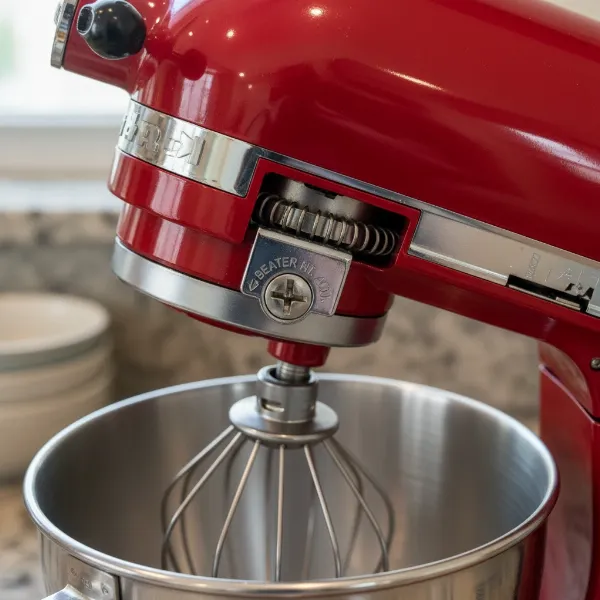 Close-up of a tilt-head stand mixer showing the beater height adjustment screw.
For Bowl-Lift Stand Mixers
Bowl-lift mixers feature a bowl that attaches to a frame and is raised or lowered by a lever. The mixer head remains stationary.
- Preparation: Turn off and unplug your mixer.
- Lower the Bowl: Use the bowl-lift lever to lower the bowl to its down position. This will expose the adjustment screw.
- Locate the Screw: The adjustment screw for bowl-lift models is typically found on the body of the stand mixer, often near the top-front of the bowl-lift mechanism, behind where the bowl sits, between the locking arms.
- Adjust: This is where it can feel a little counter-intuitive compared to tilt-head models, as you’re effectively adjusting the bowl’s height relative to the stationary beater.
- To make the beater closer to the bottom of the bowl (decrease clearance), turn the screw slightly counter-clockwise (to the left) to raise the bowl.
- To make the beater farther from the bottom of the bowl (increase clearance), turn the screw slightly clockwise (to the right) to lower the bowl.
- Again, make only very slight turns.
- Test: Raise the bowl back into the mixing position, perform the dime test, and adjust further if needed.
Beyond the Basics: Fine-Tuning for Specific Tasks
While the dime test provides the optimal general setting, an experienced baker understands that different culinary tasks can sometimes benefit from slight variations in beater-to-bowl clearance.
- Whipping Cream or Egg Whites: For achieving maximum volume and aeration, you might prefer the beater to be slightly farther from the bowl. This allows ingredients to expand freely without being constantly pushed against the sides, which can deflate air pockets.
- Kneading Dough: For heavy doughs, you want the beater (or dough hook) to be close enough to efficiently work and stretch the gluten without scraping. Too much clearance here will mean an under-kneaded, dense dough, while too little can strain your mixer.
- Folding Delicate Batters: When gently incorporating ingredients for soufflés or macarons, a touch more clearance can help reduce splatter and prevent overmixing or deflating the delicate air within the batter, resulting in a more even texture.
Think of these as nuanced adjustments you might make for very specific results, but the dime test provides the perfect baseline for 99% of your baking needs.
Maintenance Tips for Lasting Performance
Keeping your stand mixer in prime condition goes beyond just adjusting the beater height. Regular attention will ensure it serves you reliably for years.
- Regular Checks: Make the “Dime Test” a routine part of your mixer maintenance, perhaps once every few months, or if you notice any changes in mixing performance.
- Avoid Over-Adjusting: The adjustment screws are designed for subtle tweaks. Forcing them or turning them too far can strip the screw or damage the mixer’s internal mechanisms.
- Cleanliness is Key: Always clean your mixer attachments and bowl thoroughly after each use. Food residue can accumulate and affect how attachments sit in the bowl, inadvertently altering clearance.
- Consult the Manual: For specific models or if you encounter persistent issues, always refer to your stand mixer’s user manual. It contains detailed diagrams and troubleshooting tips unique to your appliance.
- Professional Help: If the adjustment screw is stuck, or if you suspect a deeper mechanical issue, it’s best to consult a certified technician. Don’t force components, as this can lead to more significant damage.
Buying Guide: Summing Up Stand Mixer Insights
When selecting a stand mixer, consider factors like your baking frequency, the types of recipes you typically make, and the batch sizes you require. Beyond capacity and power, always look for models that offer clear, accessible beater-to-bowl adjustment mechanisms. Reputable brands often provide excellent support and resources for maintenance, including guides on how to adjust the beater height. Remember that investing in a quality machine and understanding its proper care, including this crucial adjustment, is key to truly mastering your culinary craft.
Frequently Asked Questions
How often should I adjust my stand mixer’s beater height?
It’s a good practice to check your stand mixer’s beater-to-bowl clearance every few months, or whenever you switch between different types of bowls (e.g., glass to stainless steel), or if you notice your mixer isn’t performing as efficiently as it should. Adjustments may be needed due to normal wear, vibrations from use, or even shipping.
Can I use other objects instead of a dime for the test?
While a dime is universally recommended due to its consistent thickness (approximately 1.35mm or 0.053 inches), you can use any object of similar small, consistent thickness that can slide freely around the bottom of the bowl. However, a dime is readily available and the standard reference.
What if the adjustment screw is stuck or difficult to turn?
The adjustment screw is designed to be stiff to prevent accidental changes. Use the correct size flat-head screwdriver and apply firm, steady pressure. If it’s still stuck, avoid forcing it, as you could strip the screw head or damage the mechanism. In such cases, it’s best to contact the manufacturer’s customer support or a qualified service technician.
Does this adjustment method apply to all stand mixer brands?
While the general principle of adjusting beater-to-bowl clearance is universal across most stand mixer brands, the exact location and type of adjustment screw can vary. KitchenAid mixers commonly use the methods described, but always consult your specific mixer’s user manual for precise instructions.
In the world of baking, precision is paramount, and your stand mixer is your most vital tool. By understanding and routinely adjusting the beater-to-bowl clearance, you unlock its full potential, ensuring every whisk, knead, and mix is executed to perfection. No more frustrating clumps or unreached ingredients—just consistently delicious results that elevate your culinary creations. What baking challenge will you tackle next with your perfectly calibrated stand mixer?