Welcome to the Stand Mixer Pro kitchen! If you’ve ever wondered what the secret is to incredibly light cakes and perfectly textured cookies, you’ve come to the right place. It all starts with a foundational technique, a bit of kitchen science that separates good bakes from truly great ones. We’re talking about How To Cream Butter And Sugar. Mastering this simple step, especially with the help of a trusty stand mixer, will fundamentally change your baking game. Ready to unlock the secret to a fluffier, more tender crumb? Let’s dive in.
Why Creaming Butter and Sugar is a Baking Game-Changer
Before we get into the “how,” let’s talk about the “why.” Why do so many recipes insist on this step? Is it really that important? Absolutely.
Creaming isn’t just about mixing two ingredients together. It’s about aeration. When you beat butter and sugar together, the sharp edges of the sugar crystals cut into the fat, creating thousands of microscopic air pockets. These pockets are the foundation of your bake’s structure. They trap the gases released by leavening agents (like baking powder or soda), allowing your cakes to rise beautifully and your cookies to have that perfect chew.
Think of it like this: without proper creaming, your batter is like a building with a weak foundation. It might look okay from the outside, but it won’t have the structural integrity to be light, airy, and delicious. Proper creaming is the architectural work that happens before the decorating begins.
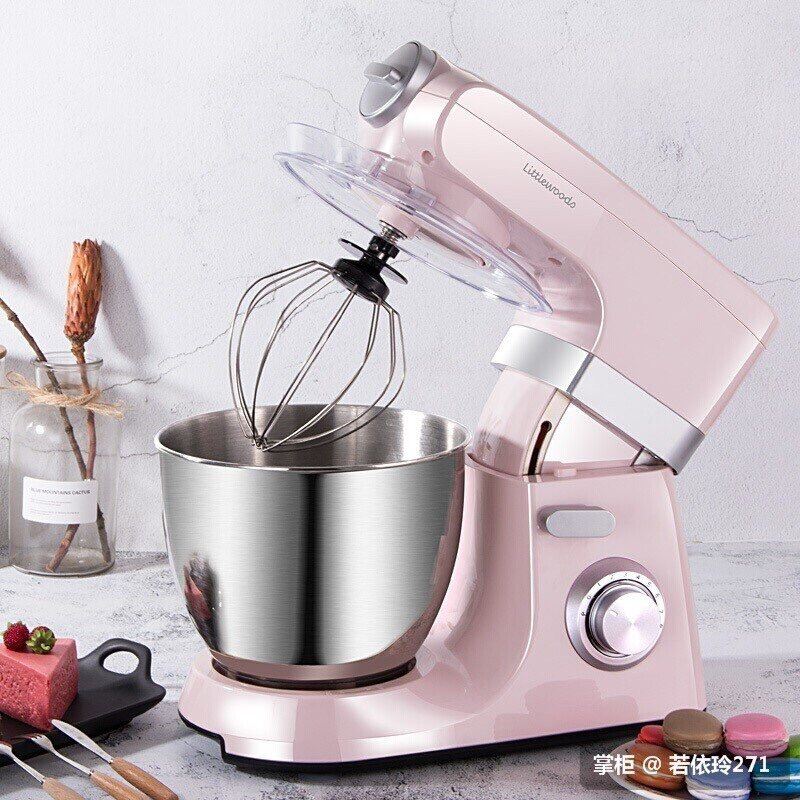
The Stand Mixer: Your Ultimate Creaming Companion
You can, of course, cream butter and sugar by hand or with a hand mixer. I did it that way for years. But let me tell you, the day I got my first stand mixer, it was a revelation. A stand mixer isn’t just a luxury; it’s a precision tool that makes the process effortless and far more effective.
Here’s why it’s the superior tool for the job:
- Consistent Power: A stand mixer delivers steady, uninterrupted power that you simply can’t replicate by hand. This ensures the butter and sugar are beaten evenly and thoroughly, creating a superior network of air pockets.
- Planetary Mixing Action: Most quality stand mixers, like those from KitchenAid or Kenwood, feature what’s called planetary mixing action. The beater spins on its own axis while also orbiting around the bowl. This means it covers virtually every inch of the bowl, eliminating the need for constant stopping and scraping.
- Hands-Free Operation: This is the big one. While your mixer is doing the hard work, your hands are free to measure out other ingredients, prepare your pans, or just grab a quick sip of coffee. It turns a chore into a seamless part of your workflow.
According to renowned pastry chef Isabelle Dubois, “A stand mixer takes the guesswork out of creaming. It provides the consistent force and time needed to achieve the perfect light and fluffy texture that is the hallmark of professional-level pastry.”
How to Cream Butter and Sugar with a Stand Mixer: A Step-by-Step Guide
Alright, let’s get down to business. You’ve got your stand mixer, your ingredients are ready, and you’re aiming for baking perfection. Follow these steps, and you’ll nail it every single time.
Step 1: Start with the Right Ingredients (Temperature is Key!)
This is the most critical part, and it happens before your mixer is even turned on. Your butter must be at the correct temperature—softened, but not melting.
- What is “softened”? It should be around 65-68°F (18-20°C). When you press it lightly with your finger, it should leave an indent without being greasy or mushy.
- Too Cold: If your butter is too cold, the sugar crystals can’t effectively cut into it. You’ll end up with a lumpy mixture and dense bakes.
- Too Warm: If your butter is too warm or melted, the mixture will become greasy. The sugar will simply dissolve, and you won’t create any of those crucial air pockets.
Pro Tip: To soften butter quickly, cut it into small cubes and let it sit at room temperature for about 20-30 minutes. Don’t microwave it unless you use very short bursts on a low power setting!
Step 2: Choose the Right Attachment
For creaming, you need the flat beater (also called the paddle attachment). Forget the whisk or the dough hook for this job. The flat beater’s design is perfect for combining ingredients and aerating the butter without whipping in too much air too quickly. It effectively “smears” and beats the mixture against the sides of the bowl.
Step 3: Begin the Creaming Process
- Attach the Bowl and Beater: Secure your mixing bowl onto the stand mixer base and attach the flat beater.
- Add Butter and Sugar: Place your softened butter cubes and granulated sugar into the bowl.
- Start Low: Lock the mixer head in place and turn the mixer on to its lowest speed (often labeled ‘Stir’). This initial low-speed mix prevents sugar from flying everywhere. Let it mix for about 30 seconds until the ingredients are just combined.
- Increase the Speed: Gradually increase the speed to medium (around a 4 or 6 on a KitchenAid mixer). You don’t want to go too high; medium speed provides the perfect balance of force and control.
- Let It Run: Now, let the mixer work its magic. This is where patience pays off. The creaming process can take anywhere from 3 to 7 minutes, depending on your mixer’s power and the recipe’s volume.
Step 4: Know When to Stop (The Visual Cues)
This is what separates the novices from the pros. You need to watch the mixture and look for these key visual changes:
- Stage 1 (The Beginning): The mixture will look gritty, dense, and yellowish, like wet sand.
- Stage 2 (Getting There): It will start to come together, becoming more paste-like and cohesive. The color will begin to lighten.
- Stage 3 (The Goal): You’ve arrived! The mixture will be visibly lighter in color, almost pale white or ivory. The texture will be fluffy, voluminous, and will look a bit like thick frosting. It will have noticeably increased in volume.
Step 5: Scrape Down the Bowl
Even with planetary mixing action, some butter and sugar can cling to the sides and bottom of the bowl. Pause the mixer at least once or twice during the creaming process. Use a flexible spatula to scrape down the sides of the bowl and the beater itself. This ensures everything is evenly incorporated for a uniform texture.
Common Creaming Mistakes (and How to Fix Them)
Learning how to cream butter and sugar also means knowing what can go wrong. Here are the most common pitfalls I see.
- The Butter is Too Cold:
- The Problem: The mixture looks clumpy and refuses to become smooth.
- The Fix: Let the bowl sit at room temperature for 15 minutes to warm up slightly, then resume mixing.
- The Butter is Too Warm/Melted:
- The Problem: The mixture looks greasy, soupy, or separated.
- The Fix: This is harder to salvage. You can try chilling the entire bowl in the refrigerator for 10-15 minutes until the butter firms up a bit, then try re-mixing.
- Under-Mixing:
- The Problem: You stop too early when the mixture is still yellow and dense. Your final product will be heavy and dense.
- The Fix: Trust the process and the visual cues! Don’t rush it. Let the mixer run for at least 3-5 minutes on medium speed.
- Over-Mixing:
- The Problem: Yes, you can overdo it! If you beat it for too long, the emulsion can break, and the mixture might look curdled as the air pockets collapse.
- The Fix: Once it’s light and fluffy, stop. It’s better to slightly under-mix than to go way over.
Frequently Asked Questions about How to Cream Butter and Sugar
Q1: How long should I cream butter and sugar in a stand mixer?
On average, creaming butter and sugar in a stand mixer on medium speed takes between 3 to 7 minutes. The goal is not to hit a specific time but to achieve a light, pale, and fluffy texture.
Q2: What speed should I use on my stand mixer for creaming?
Start on the lowest speed for about 30 seconds to combine the ingredients, then increase to a medium speed (a 4-6 on most models). A speed that’s too high can incorporate air too quickly and cause the mixture to break.
Q3: Can I cream butter and sugar if my butter is cold from the fridge?
It’s not recommended. Cold butter will not aerate properly and can even strain your mixer’s motor. Always use properly softened, room temperature butter for the best results.
Q4: Does the type of sugar matter for the creaming process?
Yes, it does. Granulated sugar is ideal because its crystals are the right size and sharpness to create air pockets. Powdered (confectioners’) sugar is too fine and will dissolve, while coarse sugars may not incorporate well.
Q5: My creamed mixture looks curdled after adding eggs. What happened?
This is a common issue! It means the emulsion broke, usually because the eggs were too cold or added too quickly. To prevent this, use room temperature eggs and add them one at a time, mixing well after each addition.
The Final Word
Mastering how to cream butter and sugar is a foundational skill that will elevate everything from your birthday cakes to your holiday cookies. It’s a perfect example of how a powerful kitchen appliance like a stand mixer isn’t just about convenience; it’s about giving you the control and consistency to achieve professional-quality results right in your own kitchen. This one technique, done correctly, is a true investment in your baking success.
Now go on, grab that flat beater, and get to creaming! We’d love to hear about your baking triumphs in the comments below.