There’s nothing quite like the convenience of a stand mixer, a true workhorse in any kitchen. But when that familiar tilt-head starts to wobble, or you notice the hinge pin creeping out of its housing, it can quickly turn a joyful baking session into a frustrating experience. A loose hinge pin isn’t just an annoyance; it can affect your mixer’s performance, lead to uneven mixing, and potentially cause damage to your attachments or bowl. This guide, brought to you by an expert with over a decade of experience, will walk you through the simple, DIY steps to tighten your tilt-head stand mixer’s hinge pin, restoring its stability and ensuring it continues to serve you well for years to come.
Understanding Your Tilt-Head Stand Mixer’s Hinge Pin
At the heart of every tilt-head stand mixer’s design is the hinge pin. This crucial component allows the mixer head to tilt back for easy access to the bowl and attachments while securely holding it in place during operation. It’s a fundamental part of the mixer’s mechanical integrity.
Over time, especially with frequent use or when tackling heavy doughs, the constant vibrations and rotational forces can cause the hinge pin to gradually loosen or protrude from its casing. This common wear and tear can manifest as a noticeable wobble in the mixer head, a hinge pin sticking out from one side, or even the beater making contact with the bottom or sides of the mixing bowl. While primarily associated with KitchenAid models, the underlying principle applies to many tilt-head stand mixers. It’s worth noting that on some very early models, this adjustment might not be applicable, but for the vast majority of modern tilt-head mixers, a simple fix is usually all that’s required.
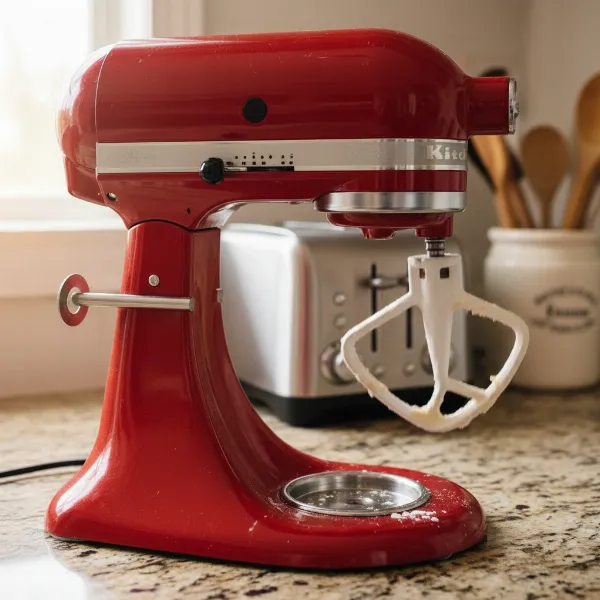 A stand mixer with a wobbly tilt-head, showing the loose hinge pin protruding.
Tools You’ll Need for the Hinge Pin Adjustment
Before you begin, gather these essential tools to make the process smooth and efficient:
- Flathead Screwdriver: Essential for older stand mixer models where the set screw often has a flat slot.
- Hex Key (Allen Wrench): Specifically a 3mm hex key, typically required for newer stand mixer models. It’s a good idea to have a set of small hex keys if you’re unsure of the exact size.
- Soft Cloth or Towel: To protect your work surface and the mixer’s finish when you tilt or invert it.
- Optional: Rubber Mallet or Small Hammer (with a protective cloth): Useful if the hinge pin is significantly protruding and needs a gentle tap to reposition.
- Optional: Threadlocker (e.g., Loctite Blue): For situations where the screw repeatedly loosens, a tiny drop can help secure it (use sparingly and ensure it’s removable type).
Having the right tools ensures you can perform the adjustment accurately and without causing damage.
Step-by-Step Guide: Tightening Your Mixer’s Hinge Pin
Restoring your stand mixer’s stability is a straightforward process. Follow these steps carefully to tighten the hinge pin and resolve any wobbling issues.
Safety First: Unplug and Prepare
Your safety is paramount. Always begin any appliance repair by taking proper precautions.
- Unplug the Mixer: Absolutely ensure the mixer is disconnected from the power outlet. This prevents accidental activation during the adjustment process.
- Clear Your Workspace: Find a clean, flat, and stable surface. Lay down a soft cloth or towel to protect both your countertop and the mixer’s finish from scratches.
- Remove Attachments: Take out the mixing bowl, beater, whisk, or dough hook to provide better access and prevent them from getting in the way.
|
Our Picks for the Best Stand mixer in 2026
As an Amazon Associate I earn from qualifying purchases.
|
||
| Num | Product | Action |
|---|---|---|
| 1 | Cuisinart Stand Mixer, 12 Speeds, 5.5-Quart Mixing Bowl, Chef's Whisk, Flat Mixing Paddle, Dough Hook, and Splash Guard with Pour Spout, Silver Lining, SM-50BC, Silver Lining |

|
| 2 | Cuisinart SM-50G Precision Master 5.5-Quart 12-Speed Stand Mixer with Mixing Bowl, Chef's Whisk, Flat Mixing Paddle, Dough Hook, and Splash Guard with Pour Spout, Agave Green, Manual |
|
| 3 | 3-IN-1 Electric Stand Mixer, 6.5QT Bowl 660W 10-Speed Kitchen Mixer, Household Food Mixers include Dough Hook, Beater and Whisk, Bread Cake Mixer for Baking and Most Home Cooks, Red |
|
| 4 | Cuisinart SMD-50BC Precision Pro 5.5-Quart Digital Stand Mixer With 12-Speeds, 3 Preprogrammed Food Prep Settings, Mixing Bowl, Whisk, Flat Mixing Paddle, Dough Hook, And Splash Guard, Silver Lining |
|
| 5 | Cuisinart SMD-50CRM Precision Pro 5.5-Quart Digital Stand Mixer with 12-Speeds, 3 Preprogrammed Food Prep Settings, Mixing Bowl, Chef's Whisk, Flat Mixing Paddle, Dough Hook, and Splash Guard, Cream |
|
| 6 | Cuisinart SPI-50 Spiralizer, White |
|
| 7 | Kitchen in the box Stand Mixer,3.2Qt Small Electric Food Mixer,6 Speeds Portable Lightweight Kitchen Mixer for Daily Use with Egg Whisk,Dough Hook,Flat Beater (Black) |
|
| 8 | Cuisinart SMD-50GPH Precision Pro 5.5-Quart Digital Stand Mixer with 12-Speeds, 3 Preprogrammed Food Prep Settings, Mixing Bowl, Whisk, Flat Mixing Paddle, Dough Hook, and Splash Guard, Graphite |
|
| 9 | Kitchen in the box Stand Mixer,3.2Qt Mini Electric Food Mixer,6 Speeds Portable Lightweight Kitchen Mixer for Daily Use with Egg Whisk,Dough Hook,Flat Beater (Green) |
|
| 10 | Kitchen in the box Stand Mixer,3.2Qt Small Electric Food Mixer,6 Speeds Portable Lightweight Kitchen Mixer for Daily Use with Egg Whisk,Dough Hook,Flat Beater (Blue) |
|
Locate the Hinge Pin and Set Screw
The critical part of this repair lies in finding the small set screw that secures the hinge pin.
- Invert or Tilt the Mixer: Gently turn your mixer upside down or tilt it carefully onto its side, resting it on the protective towel. The goal is to access the underside of the mixer head and its base. Be mindful of the speed control lever and locking mechanism.
- Identify the Hinge Pin: You’ll see the main silver hinge pin that connects the tilt-head portion to the base of the mixer.
- Find the Set Screw: Look closely underneath the mixer base, often tucked within the pedestal or directly under the tilt-head mechanism. There will be a very small set screw designed to hold the hinge pin in place. It might be subtle, so good lighting helps.
Reposition the Hinge Pin (If Necessary)
If your hinge pin has visibly shifted, it’s important to center it before tightening.
- Check Pin Alignment: Observe if the hinge pin is protruding more from one side of the mixer than the other. It should ideally be flush with both sides of the mixer’s housing.
- Gentle Repositioning: If the pin is sticking out, gently push it back into position with your finger or, if stubborn, use a soft cloth over the pin and lightly tap it with a rubber mallet or the handle of a screwdriver until it is flush on both sides.
Tighten the Set Screw
This is the core of the adjustment. Select the correct tool and tighten the screw firmly.
- Select the Correct Tool: Based on your mixer model, use either a flathead screwdriver or a 3mm hex key.
- Tighten Carefully: Insert the screwdriver or hex key into the set screw and turn it clockwise. Tighten it firmly, but do not overtighten. Overtightening can strip the screw head or damage the internal threading, making future adjustments or repairs difficult. The goal is to secure the hinge pin snugly, eliminating any play or wobble.
- Consider Threadlocker (Optional): If you’ve had recurring issues with the hinge pin loosening, a tiny drop of removable threadlocker (like Loctite Blue) on the screw threads before tightening can provide extra security. Allow adequate time for it to cure before using the mixer.
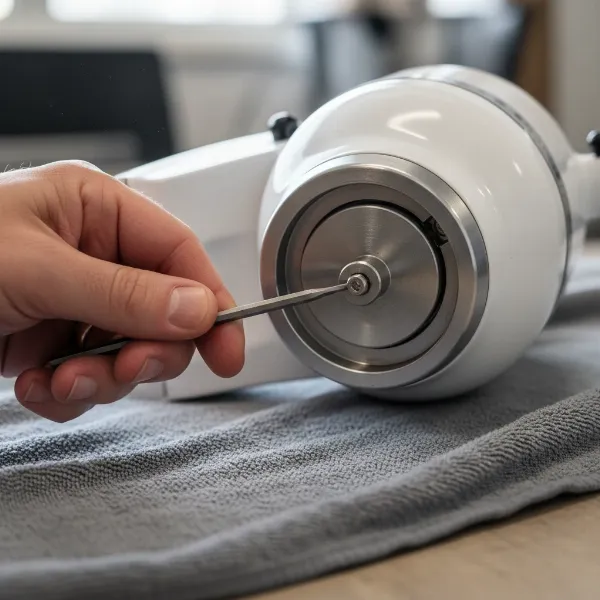 Hand tightening the set screw on a stand mixer's hinge pin with a hex key.
Verify and Reassemble
Once the screw is tightened, it’s crucial to confirm the repair and make a final adjustment.
- Check Head Stability: Turn the mixer upright. With the head locked down, gently try to wiggle the tilt-head. It should feel stable and firm, with minimal to no side-to-side movement.
- Adjust Beater-to-Bowl Clearance: A loose hinge pin often affects the beater-to-bowl clearance, causing attachments to hit the bowl or not reach ingredients effectively. This adjustment is vital for optimal mixing.
- Place the flat beater into the mixer.
- Unlock the head and tilt it down.
- Insert your mixing bowl.
- Check the gap between the beater and the bottom of the bowl. Ideally, the beater should just clear the bottom, scraping the bowl slightly.
- If adjustment is needed, locate the small screw on the neck of the mixer (usually on the pivot head itself, near where the beater attaches).
- Turn this screw clockwise to lower the beater or counter-clockwise to raise it, making small adjustments until the proper clearance is achieved. Test with a small amount of flour or water to see if the beater effectively scrapes the bottom.
Maintaining Your Stand Mixer: Beyond the Hinge Pin
Proactive maintenance goes a long way in extending the life of your stand mixer and preventing future issues.
- Regular Checks: Periodically check the hinge pin and its set screw, especially after heavy-duty mixing tasks. A quick check can prevent significant wobbling from developing.
- Proper Cleaning: Always clean your mixer after each use. Wipe down the body to prevent residue buildup, which can hide loose parts or interfere with mechanisms. Ensure all attachments are clean and dry before storage.
- Store Properly: Keep your mixer in a dry, clean place. Avoid storing it in areas with extreme temperature fluctuations or high humidity.
Troubleshooting Common Stand Mixer Issues
While a loose hinge pin is a common problem, stand mixers can face other challenges. Understanding these can help you maintain your appliance better. For instance, if your mixer strains during operation, it could indicate an overworked motor or an issue with the gears, often exacerbated by mixing overly stiff doughs. If attachments aren’t fitting correctly, it might be due to a bent attachment shaft or debris in the hub. Regular cleaning of the attachment hub and ensuring attachments are inserted correctly can prevent these minor issues from escalating.
Expert Insights on Mixer Longevity
“From my decade of working with stand mixers, I’ve seen that consistent, minor maintenance often prevents major repairs. Don’t wait for the hinge pin to fall out; a simple tighten when you first notice a wobble can save you time and frustration, keeping your mixer performing like new.” – Admin, Standmixerpro.com
Conclusion
A wobbly stand mixer head doesn’t have to signal the end of its life. By understanding the function of the hinge pin and following these straightforward steps to tighten its set screw, you can easily restore stability and precision to your beloved appliance. Remember to always prioritize safety by unplugging the mixer, and don’t forget the crucial step of re-adjusting the beater-to-bowl clearance for optimal performance. Regular checks and proper maintenance are key to ensuring your stand mixer remains a dependable partner in your culinary adventures. What other stand mixer maintenance tips have you found most helpful in your kitchen?
Frequently Asked Questions
Why is my KitchenAid mixer head wobbly?
A wobbly tilt-head on your KitchenAid mixer is typically caused by a loose hinge pin, which secures the head to the base. Over time, vibrations from mixing can cause the small set screw that holds this pin in place to loosen, leading to instability.
What size hex key do I need for a KitchenAid hinge pin?
For most newer KitchenAid tilt-head Stand Mixers, you will need a 3mm hex key (Allen wrench) to tighten the hinge pin’s set screw. Older models may use a flathead screwdriver for this adjustment.
Can I use Loctite on the hinge pin screw?
Yes, you can use a small amount of blue (removable) threadlocker, such as Loctite Blue, on the set screw if it frequently loosens after tightening. Apply it sparingly to the screw threads, being careful not to get it into other mixer components.
How often should I check my mixer’s hinge pin?
It’s a good practice to check your mixer’s hinge pin and head stability periodically, especially if you use your mixer frequently or for heavy-duty tasks like bread dough. A quick check every few months or at the first sign of wobble is recommended.
What is the beater-to-bowl clearance adjustment?
The beater-to-bowl clearance adjustment ensures your mixer’s attachment (beater, whisk, dough hook) sits at the correct height within the mixing bowl. After tightening the hinge pin, this often needs to be re-adjusted so the attachment just scrapes the bottom of the bowl without hitting it forcefully.