Dreaming of fluffy, melt-in-your-mouth marshmallows, far superior to anything store-bought? Many home bakers shy away from making this delightful confection, intimidated by the process or wary of damaging their equipment. The secret to achieving that perfect, airy texture lies not just in the ingredients, but in harnessing the power of a reliable stand mixer. This comprehensive guide will walk you through every step of making exquisite homemade marshmallows with your stand mixer, from gathering your tools to troubleshooting common issues, ensuring your sweet treats are nothing short of perfection.
Understanding the Magic of Marshmallows and Your Stand Mixer
Marshmallows are a surprisingly simple yet sophisticated confection, primarily composed of sugar, corn syrup, gelatin, and water, meticulously whipped to incorporate air and create their signature spongy lightness. While their history dates back to ancient Egyptians who used mallow root, modern marshmallows rely on gelatin for their structure, making them accessible to any home kitchen.
The stand mixer is the undisputed star in this culinary creation. Unlike hand mixers, which often lack the power and endurance, a robust stand mixer with a whisk attachment can effortlessly handle the long beating times (typically 10-15 minutes) required to transform hot sugar syrup and gelatin into a voluminous, glossy, and impossibly fluffy marshmallow base. This consistent, high-speed aeration is crucial for achieving the light, airy texture that defines a truly exceptional marshmallow. Without a stand mixer, you risk an underdeveloped texture or, worse, burning out the motor of a less powerful appliance.
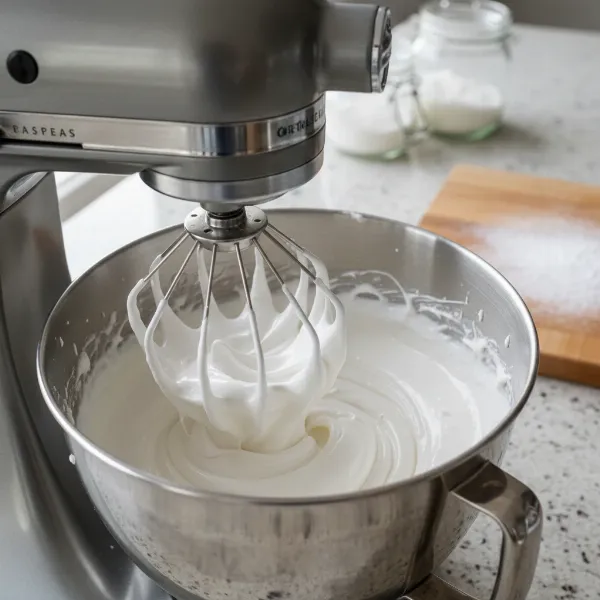 Stand mixer vigorously whipping white marshmallow mixture in a stainless steel bowl, creating airy texture.
Essential Tools and Ingredients for Perfect Marshmallows
Embarking on your marshmallow-making journey requires a few key pieces of equipment and precise ingredients. Having everything ready before you begin will ensure a smooth and successful process.
Gathering Your Arsenal: Tools
- Stand Mixer with Whisk Attachment: This is non-negotiable for successful homemade marshmallows, providing the power and consistency needed for proper aeration.
- Candy Thermometer: An absolute essential for accurately monitoring the sugar syrup’s temperature. Precision here prevents marshmallows that are too soft or too hard.
- Heavy-Bottomed Saucepan: A sturdy saucepan distributes heat evenly, preventing the sugar syrup from burning.
- Baking Pan (9×13 inch recommended): Choose a pan appropriate for the batch size; lining it correctly is key for easy removal.
- Stiff Spatula: Indispensable for scraping the thick, sticky marshmallow mixture from the bowl and into the pan.
- Parchment Paper: Used to line the baking pan, preventing sticking and assisting in easy removal.
- Pastry Brush (Optional but Recommended): Helpful for washing down sugar crystals from the sides of the saucepan, preventing crystallization of the syrup.
- Sharp Knife or Pizza Wheel: For cleanly cutting the set marshmallows into individual pieces.
|
Our Picks for the Best Stand mixer in 2026
As an Amazon Associate I earn from qualifying purchases.
|
||
| Num | Product | Action |
|---|---|---|
| 1 | Kitchen in the box Stand Mixer,3.2Qt Small Electric Food Mixer,6 Speeds Portable Lightweight Kitchen Mixer for Daily Use with Egg Whisk,Dough Hook,Flat Beater (Black) |

|
| 2 | Cuisinart SMD-50CRM Precision Pro 5.5-Quart Digital Stand Mixer with 12-Speeds, 3 Preprogrammed Food Prep Settings, Mixing Bowl, Chef's Whisk, Flat Mixing Paddle, Dough Hook, and Splash Guard, Cream |
|
| 3 | Cuisinart SMD-50BC Precision Pro 5.5-Quart Digital Stand Mixer With 12-Speeds, 3 Preprogrammed Food Prep Settings, Mixing Bowl, Whisk, Flat Mixing Paddle, Dough Hook, And Splash Guard, Silver Lining |
|
| 4 | Cuisinart SMD-50GPH Precision Pro 5.5-Quart Digital Stand Mixer with 12-Speeds, 3 Preprogrammed Food Prep Settings, Mixing Bowl, Whisk, Flat Mixing Paddle, Dough Hook, and Splash Guard, Graphite |
|
| 5 | Cuisinart SM-50G Precision Master 5.5-Quart 12-Speed Stand Mixer with Mixing Bowl, Chef's Whisk, Flat Mixing Paddle, Dough Hook, and Splash Guard with Pour Spout, Agave Green, Manual |
|
| 6 | 3-IN-1 Electric Stand Mixer, 6.5QT Bowl 660W 10-Speed Kitchen Mixer, Household Food Mixers include Dough Hook, Beater and Whisk, Bread Cake Mixer for Baking and Most Home Cooks, Red |
|
| 7 | Cuisinart Stand Mixer, 12 Speeds, 5.5-Quart Mixing Bowl, Chef's Whisk, Flat Mixing Paddle, Dough Hook, and Splash Guard with Pour Spout, Silver Lining, SM-50BC, Silver Lining |
|
| 8 | Cuisinart SPI-50 Spiralizer, White |
|
| 9 | Kitchen in the box Stand Mixer,3.2Qt Small Electric Food Mixer,6 Speeds Portable Lightweight Kitchen Mixer for Daily Use with Egg Whisk,Dough Hook,Flat Beater (Blue) |
|
| 10 | Kitchen in the box Stand Mixer,3.2Qt Mini Electric Food Mixer,6 Speeds Portable Lightweight Kitchen Mixer for Daily Use with Egg Whisk,Dough Hook,Flat Beater (Green) |
|
The Sweet Science: Ingredients
- Unflavored Gelatin: The foundational gelling agent that gives marshmallows their characteristic bounce and structure.
- Granulated Sugar & Light Corn Syrup: These provide the primary sweetness. The corn syrup is particularly important as it helps prevent the sugar syrup from crystallizing, ensuring a smooth texture.
- Water: Used to bloom the gelatin and to dissolve the sugar for the syrup.
- Vanilla Extract: The classic flavoring for marshmallows, though other extracts can be used for variations.
- Powdered Sugar & Cornstarch: Combined, these form the dusting mixture that prevents the cut marshmallows from sticking together.
Step-by-Step Guide: Making Marshmallows with Your Stand Mixer
With your tools and ingredients at the ready, let’s dive into the process of creating your own cloud-like confections. Precision and timing are crucial here, but your stand mixer will handle much of the heavy lifting.
Preparation is Key
Before you even touch the heat, ensure your workspace and pan are ready. This sticky mixture waits for no one!
- Prepare Your Pan: Lightly spray your baking pan with cooking spray. Line it with parchment paper, allowing an overhang on two sides to act as “handles” later. Lightly grease the parchment paper as well. In a small bowl, whisk together 1.5 cups of powdered sugar and 0.5 cups of cornstarch, then generously dust the bottom and sides of the prepared pan with this mixture, shaking out any excess. This coating is critical for preventing sticking.
- Bloom the Gelatin: In the bowl of your stand mixer, sprinkle the unflavored gelatin powder over 0.5 cups of cold water (and 1.5 tablespoons of vanilla extract, if you prefer to add it here). Gently whisk with a fork until the gelatin absorbs the water and reaches the consistency of applesauce, with no large lumps. Allow it to sit for 5-10 minutes to fully bloom. Fit your stand mixer with the whisk attachment.
Crafting the Sugar Syrup
This is where the candy thermometer earns its keep. Accurate temperature is vital for the marshmallow’s final texture.
- Combine Ingredients: In your heavy-bottomed saucepan, combine 0.75 cups of water, 1.5 cups of granulated sugar, 1.25 cups of light corn syrup, and a pinch of kosher salt. Do not stir the mixture at this stage.
- Boil to Temperature: Place the saucepan over medium-high heat. Bring the mixture to a full, rapid boil. As it heats up and begins to boil, occasionally dip a pastry brush in water and gently brush down any sugar crystals that form on the sides of the pot. Alternatively, cover the pan for two minutes once boiling so the steam can wash the sides clean. This prevents crystallization. Clip your candy thermometer to the side of the pan, ensuring it doesn’t touch the bottom. Continue to boil the syrup without stirring until it reaches 240°F-250°F (115°C-121°C), also known as the soft-ball stage. Once the temperature is reached, immediately remove the pan from the heat and carefully remove the thermometer.
The Stand Mixer Does the Work
Now, the bloomed gelatin meets the hot syrup, and your stand mixer takes center stage.
- Combine Syrup and Gelatin: With your stand mixer on low speed, carefully and slowly pour the hot sugar syrup down the side of the mixing bowl, aiming to avoid the spinning whisk attachment. The hot syrup will melt the bloomed gelatin, and the mixture will begin to thicken.
- Whip to Perfection: Once all the syrup has been added, gradually increase the mixer speed to high. You can drape a clean kitchen towel over the bowl to protect against splatters, removing it once the mixture begins to thicken. Continue beating for 10-15 minutes. During this time, the mixture will transform: it will start clear and frothy, then become opaque white, creamy, and significantly increase in volume. It will cool to lukewarm and resemble soft-serve vanilla ice cream when it’s ready. You’ll observe thick, sticky strands forming between the whisk and the bowl.
- Add Flavorings (if not added earlier): If you didn’t add vanilla extract with the gelatin, you can incorporate it during the last minute of mixing on high speed.
Setting, Cutting, and Storing
The final steps involve patience and a bit more dusting to achieve those classic, non-sticky marshmallow cubes.
- Pour and Smooth: As soon as the mixture reaches the desired consistency, immediately transfer the sticky marshmallow mixture into your prepared baking pan. Use your stiff spatula, lightly greased with cooking spray, to scrape out as much as possible. Lightly grease your hands with cooking spray and gently press and smooth the top of the marshmallow mixture to an even layer.
- Set: Leave the pan uncovered at room temperature for at least 6 hours, or preferably overnight (up to 24 hours), to allow the marshmallows to fully set and “cure.”
- Dust and Cut: Once completely set, gently lift the marshmallow slab out of the pan using the parchment paper overhang and place it on a clean work surface. Sprinkle the top generously with more of your powdered sugar and cornstarch dusting mixture. Flip the slab over and dust the other side as well. Using a sharp knife or pizza wheel lightly greased with cooking oil (re-greasing after every few cuts helps immensely), cut the marshmallows into your desired squares or shapes.
- Coat and Store: Toss each freshly cut marshmallow piece in the remaining dusting mixture, ensuring all sides are thoroughly coated to prevent sticking. Store your homemade marshmallows in an airtight container at room temperature for up to two weeks. Avoid refrigeration, as it can cause them to become too firm.
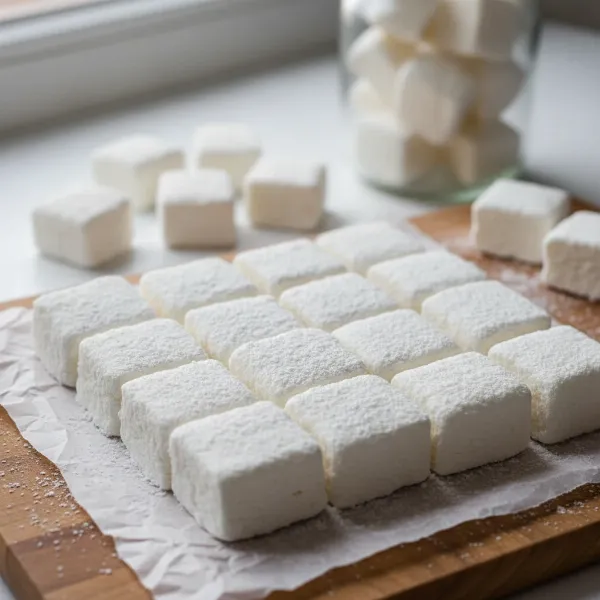 Perfectly cut and dusted homemade marshmallow squares piled neatly on parchment paper.
Troubleshooting Common Marshmallow Problems
Even with the best intentions, baking can sometimes present challenges. Here are solutions to common marshmallow issues:
- Marshmallows Too Soft or Runny: This usually indicates the sugar syrup did not reach the correct temperature. A reliable candy thermometer is paramount. Always ensure it’s calibrated and used correctly.
- Marshmallows Too Firm or Hard: Conversely, if your marshmallows are overly firm, the sugar syrup was likely cooked too long or reached too high a temperature. Double-check your thermometer and remove the syrup promptly once the target temperature is hit.
- Marshmallows Are Sticky: Insufficient dusting powder or not allowing enough setting time are common culprits. Ensure both sides and all cut edges are thoroughly coated in the powdered sugar/cornstarch mixture, and give them the full setting time. Greasing your knife or pizza wheel during cutting also helps.
- Sugar Syrup Crystallized: This happens if sugar crystals cling to the side of the saucepan and fall back into the boiling syrup, or if the syrup is stirred once it’s boiling. Using a damp pastry brush or covering the pan briefly helps wash down any errant crystals.
- Mixer Overheated or Died: This is the most common issue with hand mixers. The long beating time and increasing thickness of the marshmallow mixture require the robust motor of a stand mixer. If you’re serious about making marshmallows, a stand mixer is a worthwhile investment.
Unleash Your Creativity: Marshmallow Variations
Once you’ve mastered the basic recipe, the world of marshmallow customization opens up. Your stand mixer makes it easy to incorporate a variety of flavors and colors.
- Flavorings: Experiment with different extracts like peppermint for holiday treats, almond for a sophisticated touch, or lemon and orange for a zesty twist. You can also incorporate fruit purees (reduce water in the recipe slightly to account for the liquid).
- Coloring: Add a few drops of gel food coloring during the last few minutes of mixing for vibrant, festive marshmallows. Gel colors are concentrated and won’t affect the consistency.
- Coatings: Beyond the classic powdered sugar, try dusting with toasted shredded coconut, unsweetened cocoa powder for chocolate marshmallows, or even crushed freeze-dried fruit for an extra burst of flavor and color.
- Shapes: Instead of squares, use greased cookie cutters to create fun shapes for special occasions.
Buying Guide: Choosing Your Stand Mixer for Marshmallow Making
For any serious baker, and especially for those who love making confections like marshmallows, a stand mixer is an invaluable kitchen appliance. When choosing one, consider these factors:
- Power (Wattage/Horsepower): Look for mixers with robust motors. For consistent marshmallow making and other heavy-duty tasks, models with 300 watts or more, or at least 0.5 horsepower, are ideal. They can handle the thick, sticky marshmallow batter without straining.
- Bowl Capacity: A 5-7 quart bowl is generally perfect for most home baking needs, accommodating standard marshmallow recipes without overflow.
- Attachments: Ensure the mixer comes with a sturdy wire whisk attachment, as this is the primary tool for marshmallow aeration. A paddle attachment is also useful for other baking tasks.
- Durability and Construction: Mixers with metal gears and a heavy-duty, all-metal construction tend to be more durable and last longer, enduring the stresses of thick mixtures.
- Brands: Established brands like KitchenAid, Cuisinart, Ankarsrum, and Bosch are renowned for their quality, performance, and longevity in the stand mixer market. While they represent an investment, they are built to last through countless baking adventures.
“A stand mixer isn’t just a convenience; for challenging recipes like marshmallows, it’s a necessity. It provides the consistent power and hands-free operation that makes success achievable.” – Admin, Standmixerpro.com
In my decade of experience as a stand mixer technician, I’ve seen firsthand how a good quality mixer can transform complex recipes into joyful successes. Don’t compromise on this essential piece of equipment.
Conclusion
Homemade marshmallows are a truly rewarding treat, offering an unparalleled freshness and customizable flavor that store-bought versions can’t match. With your trusty stand mixer, the process becomes not only manageable but genuinely enjoyable. Remember the key elements: precise sugar syrup temperature, thorough blooming of gelatin, and the sustained, powerful whipping action of your stand mixer. A little patience for setting time, and you’ll be rewarded with fluffy, cloud-like confections. Investing in a quality stand mixer is an investment in your culinary adventures, opening doors to a world of baking possibilities far beyond just marshmallows.
So, are you ready to elevate your sweet treats? What unique flavor will you create for your next batch of homemade marshmallows?
Frequently Asked Questions
What is the ideal temperature for marshmallow sugar syrup?
The ideal temperature for marshmallow sugar syrup typically ranges between 240°F and 250°F (115°C-121°C). This range corresponds to the “soft-ball stage,” which is crucial for achieving the perfect balance of firmness and chewiness in your homemade marshmallows. Using a candy thermometer is essential for accuracy.
Can I make marshmallows without a stand mixer?
While technically possible with a powerful hand mixer, it is not recommended for homemade marshmallows. The long beating time (10-15 minutes) and the thick, sticky consistency of the marshmallow mixture can easily overwork and burn out the motors of most hand mixers. A stand mixer provides the necessary power and consistent whipping for optimal aeration and texture.
Why are my homemade marshmallows sticky?
Homemade marshmallows often turn out sticky if they haven’t been adequately dusted with a powdered sugar and cornstarch mixture, or if they haven’t had enough time to fully set or “cure.” Ensure you generously coat all sides of your cut marshmallows and allow them to sit uncovered at room temperature for at least 6-24 hours after pouring.
How long do homemade marshmallows last?
When stored properly in an airtight container at room temperature, homemade marshmallows can last for up to two weeks. It’s best to avoid refrigerating them, as the cold can alter their texture and make them too firm. Freezing is an option for longer storage, but they may lose some of their initial fluffiness upon thawing.
Can I use different flavorings in my marshmallows?
Absolutely! Once you master the basic recipe, you can easily customize the flavor of your marshmallows. Popular alternatives to vanilla include peppermint, almond, lemon, orange, or even coffee extracts. You can also experiment with gel food colorings to match your flavor choices or for festive occasions. Add flavorings during the last minute of whipping.